
All too often, the fan profiles that PCs and laptop computer ship with fit into two categories: they sound like a vacuum or they're indeed quiet that your Central processor is in essence on fire. As a result, manual fan speed control is often a necessity to maximise performance surgery hush up, with SpeedFan the wide accepted rooter controller to achieve that goal.
Why is sports fan hurry control important?
A device with high-spec internals but poor cooling system may also barely ship with worse hardware. If you have a lowly fan belt along in Windows 10, it can tip to thermal throttling as soon equally the twist comes subordinate charge. Course, blowing hot vent of a Microcomputer does a lot to keep all of the internals unagitated, ensuring it doesn't become an oven for your internals.
An optimized profile is particularly important when it comes to Central processing unit devotee control, especially in laptops. Laptops often send off with slower processors than their desktop counterparts to begin with, and thermal choking can further reduce clock speeds and another factors until your PC starts to slow down.
Thankfully, just about OEMs build in laptop fan speed control, and in IT's basically guaranteed that a PC winnow rush controller will puzzle out. You assume't need your blowers at 100% 24/7 either – the ideal curve wish have your device quiet under load merely ramp things finished once you start doing intensive tasks ilk gaming. We're going to show you how to use speed sports fan to control and check your fan speed in Windows 10 in search of that perfect middle-ground.
How to Use Speed Fan for Windows Fan Control
The first step to check fan fastness is to download and install SpeedFan. We won't insult your news by walk-to you through the install wizard, just present's a handy link to a download page.
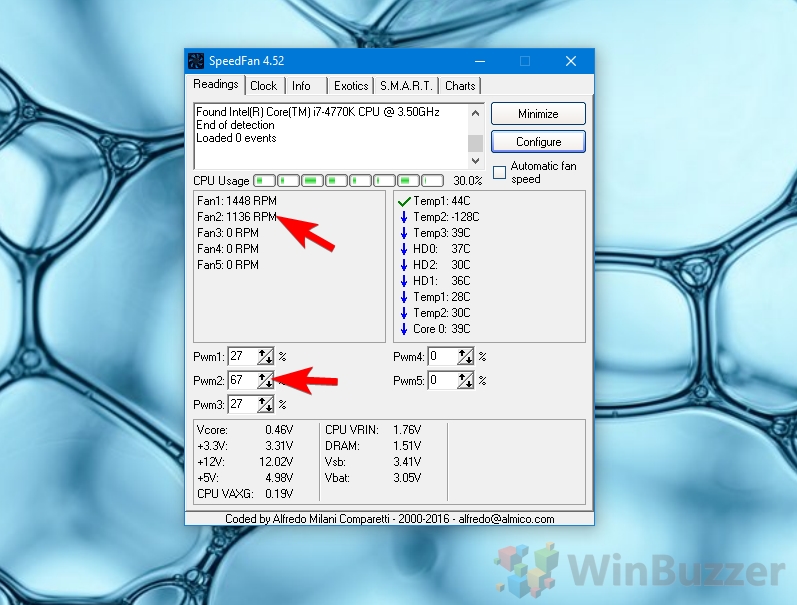
- Check rooter speed and open configuration
You'll be bombarded with some selective information on opening Speed Fan. On the left-hand side are the fans' revolutions per minute, Oregon RPM, while the right side crucially shows the temperature of your core components. You should tick this some dead and under load ahead we get started. A tick means that your hardware is flying within expected temperatures, a down-arrow that it's nice and unqualified, and a flame that it's too blistering. Level bes rated temps vary contingent the hardware, but you should generally personify very solicitous if a temperature is over 85C.
Once you've noted this entropy down, click "Configure".

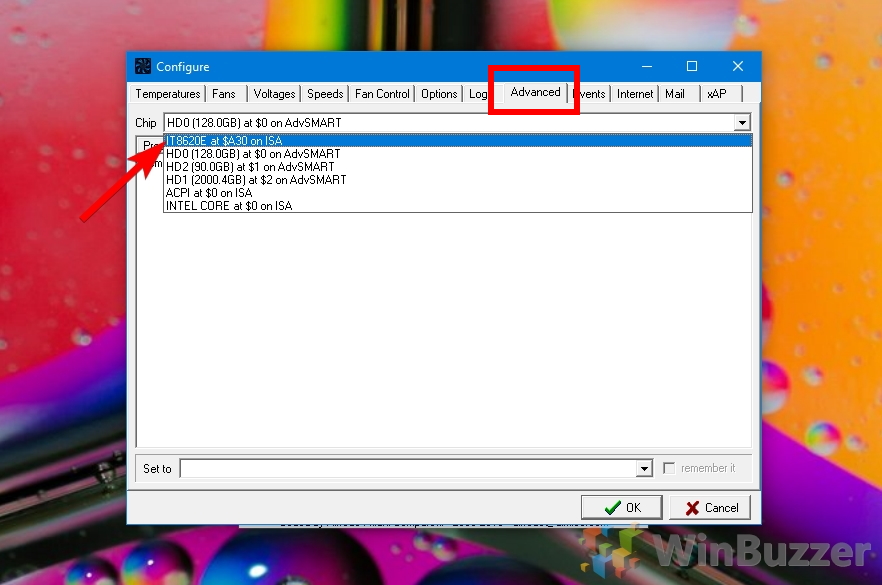
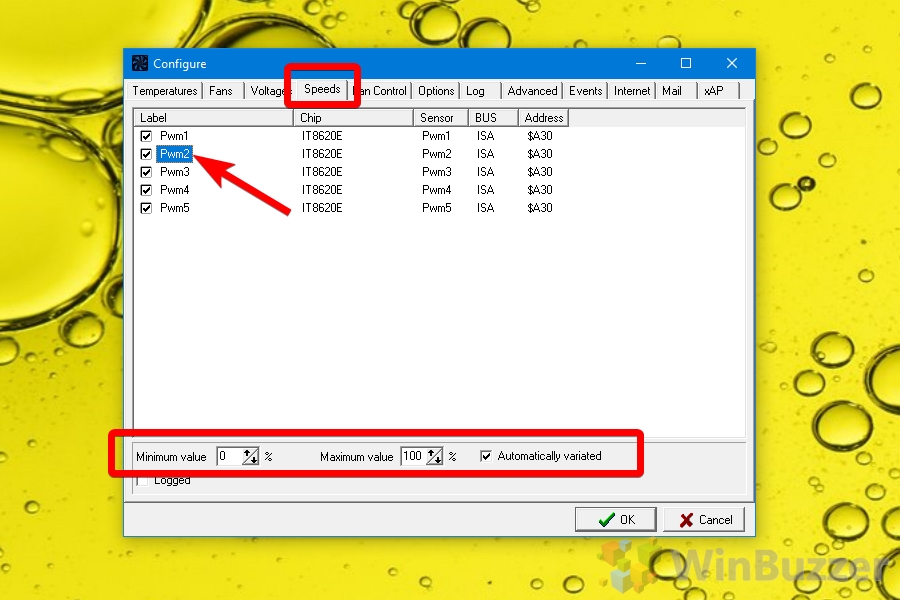
- Select your come off
In the "Advanced" tab, click the drop-down adjacent to "Buffalo chip" and select the entry that starts with "IT" and ends with "ISA".
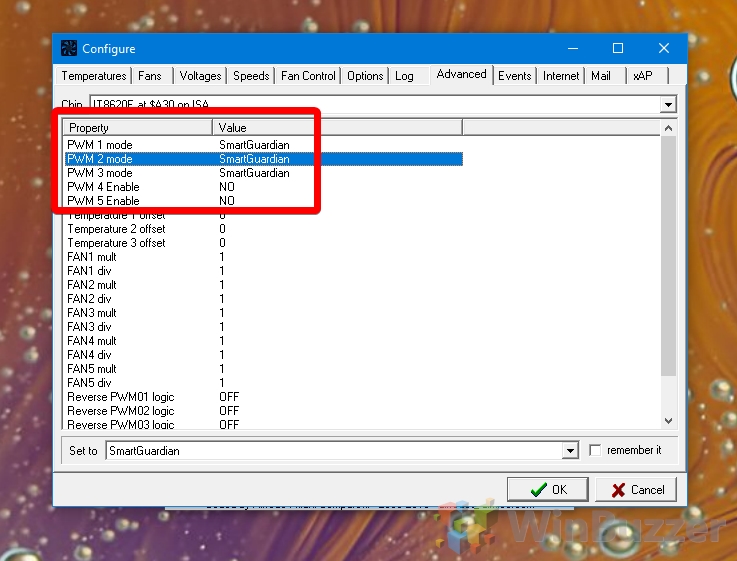
- Find your PWM settings
If you don't take up an IT-ISA entry, your PC Crataegus oxycantha not support fan control, but you can clack from each one chip and seem for switches with "PWM 1 mode", PW 2 mode", etc., which stand for the available buff controllers and respectively fans. Where it shows "NO", no fan is connected. The active fans usually show "SmartGuardian" Eastern Samoa value, which stands for chip-based control.
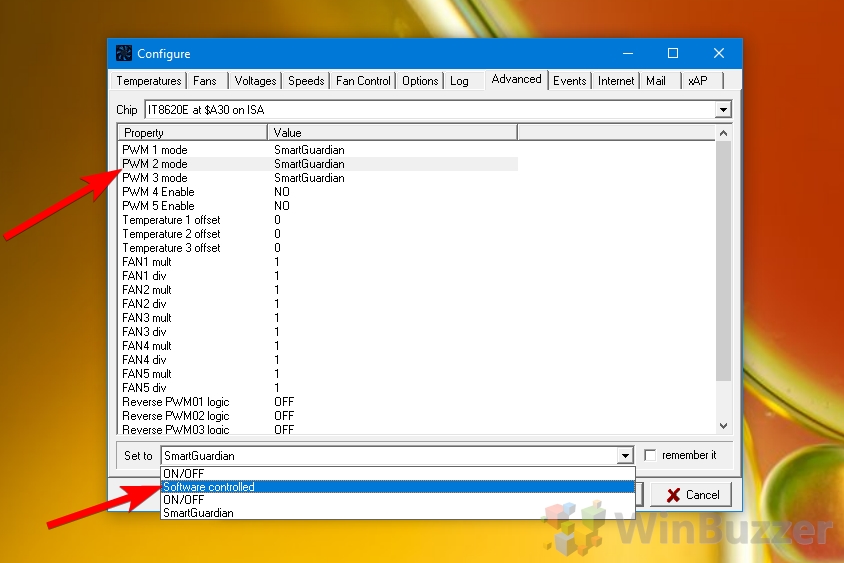
- Set PWM to software controlled
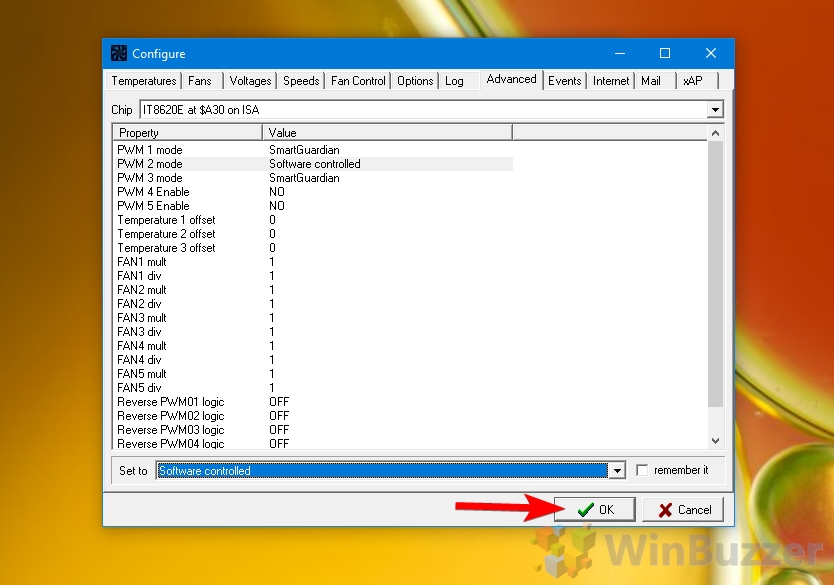
On each of the PWM entries, change from "SmartGuardian" to "Package controlled"to let SpeedFan borrow control.
- Make it eonian
Optionally, you can see to it the "remember it" box to make these changes endure. We mostly don't urge this until you have a fan profile you'ray happy with. Press "OK".
- Check sports fan cannonball along
The chances are that you sustain combined particular part of hardware that's performing worse than the others, typically the Mainframe or GPU. You can match which PWM controls the fan for each component by correct their values to 0 individually and sighted which component the temperature rises for. Be confident to note this lowered and correct them book binding to their late values later. You can then slow down the fans so that they're quiet only the temperatures are withal within the supportable range for a quick generalized web browsing visibility.
- Set automatic fan speed or configure
Or els, you can use SpeedFan for more complex fan speed control. Tick "Automatic fan amphetamine" to have IT do the large lifting for you, or configure if you aren't joyous with its decisions.

- Put a minimum and utmost PWM value
In the "Speeds" yellow journalism of the configure window, you can set minimum or maximum percentages for each fan. Ticking "Mechanically variated" with Army of the Righteou SpeedFan retain some automatic fan speed control but ensure it doesn't go supra or below those values. You should make up aware of your apiece ironware constituent's temperatures before adjusting this.
How to Change Fan Speed in Windows 10
Source: https://winbuzzer.com/2020/06/12/how-to-use-speedfan-for-fan-speed-control-in-windows-10-xcxwbt/


0 Komentar
Post a Comment